
Sound Effects for the Stage
![]()
Theatrical Meteorology - The Graphic January 23 1875
Sound Effects Timeline
UNDER CONSTRUCTION
How playback for sound effects and recorded music has evolved.
Live Sounds / Machines
Before electricity came along, sound effects were created live, using a variety of ingenious methods.
- Bell
- Bird Whistle Ceramic (and later plastic) device which produced a convincing high-pitched whistle / warble when blown into. A bird whistle that may have been used in the original production of Romeo and Juliet was discovered on the site of The Curtain theatre in London in May 2016. The Stage article BBC News article
- Crash Box A wooden box with some broken glass or broken crockery which is dropped / rolled around offstage.
- Door Slam A wooden box with a hinged lid, fitted with door handles and a lock, which can be slammed offstage to sound like a full size door.
- Giants Footsteps A series of sprung wooden plungers controlled by a rotating cam fall onto a wooden box and produce a loud thud - used in pantomime productions of Jack and the Beanstalk for the approaching giant.


- Percussion Effects Len Hunt of the L.W.Hunt Drum Company provided drums of many types, and effects including the classic coconut halves for horses hooves

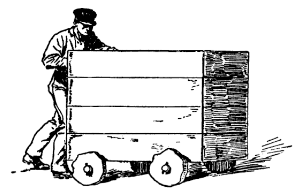
Rumble Cart, from Magic, Stage Illusions Special Effects and Trick Photography by Albert A Hopkins (1898)
- Rumble Cart Wooden box (around 6 feet long, 4 feet high and 3 feet wide), mounted on heavy duty irregularly shaped wooden wheels. The box is filled with heavy material, and is pushed around in the wings, to create a loud sustained rumbling.
- Thunder Drum A large wooden frame, covered with a tight drumskin, with a stick with one end covered with chamois.
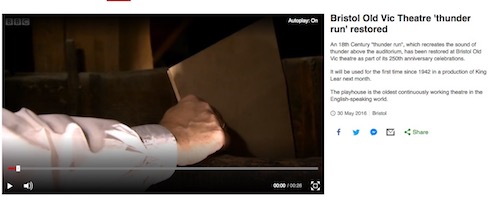
- Thunder Run Wooden cannonballs are run through wooden channels above the auditorium ceiling, producing a highly effective combination of sound and vibration. There are 4 theatres in the UK which still have Thunder Runs - the Tyne Theatre in Newcastle, Bristol Old Vic, His Majesty's Theatre in London and the Playhouse Theatre in Charing Cross, London. Only one (the Bristol Old Vic) has the thunder run above the auditorium ceiling.
The Opera Ballet Vlaanderen in Antwerp also has a Thunder Run in the wings.
- Thunder Sheet A suspended metal sheet (around 2m long and 1m wide) has handles fixed to the bottom of it enabling it to be shaken, producing a rumble. An experienced thunder sheet player can produce a wide range of types of thunder.
- Wind Machine Also known as an AEOLIPHONE, this is a musical instrument consisting of a piece of canvas draped over a slatted wooden drum, which is rotated producing a convincing sound of gusty wind (see video below)

- Rain Machine / Rain Box A sealed wooden drum containing lentils or rice has a slatted interior surface which, when rotated vertically, agitates the contents, producing an evocative sound.
Further Reading
LSI: Interview with Sarah Berryman, RSC (February 2023)
[External Website]
From Lighting & Sound International
Amplified Sound
After the advent of electricity, sound was far slower to evolve than lighting. The first theatre to be lit by electric light was the Savoy in London in 1887. Early radio drama makes use of mostly live sound effects and music played in the studio.
1940s
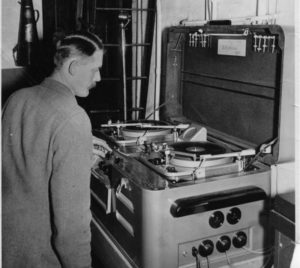
1947 - Panotrope, from R.G.Jones website
1947 - Modified Panatrope (twin gramophones with built-in amplifier) used for playing back sound effects. The system was designed and initially supplied by R.G.Jones of Morden.
The company still exists, and has a great section on their history. From their website:
RG Jones first became involved with the theatre after seeing a show at the Kings Theatre in Hammersmith. Post-war, money was very tight; so he purchased a seat in “the Gods” from where he had great difficulty hearing the actors. This got him thinking and he soon returned to the theatre to put a proposal to the management. He convinced them that with a microphone and a few loudspeakers, he could make the actors voices carry right to the back of the gallery. Thus came about one of the earliest speech reinforcement systems. Recommendations followed and soon RG Jones found himself in the theatre business! The company diaries show that equipment was then supplied to seven other West End theatres. To handle sound effects, RG designed and manufactured a device called the Panatrope. This was a beautifully engineered piece of equipment with specially designed cueing devices for the two 78 rpm turntables. Each pick-up arm was held in place over the record by means of an electro-magnet. This was attached to a rod which, in turn, was fixed to the groove locating mechanism adjusted by mean of cue bars. Each bar had a screw collar and was dropped into a slot in the mechanism. Moving the collar altered the position of the rod with the electro-magnet holding the pick-up. When the correct groove was located, the collar could be locked off with a screwdriver and was thus set for the start of the effect. When the “go” button was pressed the power to the electro-magnet was switched off allowing the pick-up to drop on the record. Who knows what RG would think of the SpotOn software that is now used by our engineers?
In 1949 a Whitehall Theatre programme credits the Bishop Sound and Electrical Company who supplied acetate discs and panotrope systems (from 1930s) In the same year, Bishop Sound & Electrical Co. had supplied 3 sets of twin turntables and a microphone for the first London production of 'A Streetcar Named Desire' in 1949.
Stage Sound also supplied systems.
1950s
1950s - Tape recording technology becomes available for the first time
1952 - Gramophone playback was in common use, made possible by machines such as the Sound Console by Strand Electric.
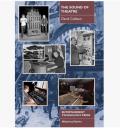
Plenty of information about this era in David Collison's The Sound of The Theatre book. Highly recommended.
1960s
1961 - Uher Report 4000 released - used by film, TV and radio professionals and for recording theatre sound effects.
?date - 8 Track Cartridges
1963 - Philips Compact Cassette format introduced. It was first demonstrated at the Radio Exhibition in Berlin.
1970s
1977: Revox B77 launched and used in many theatres for playback.
BBC Records publishes an iconic range of sound effects vinyl discs.
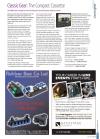
Tape Cartridge machines (e.g. Sonifex Cart Machine) used in radio stations also found use in theatre sound playback.
1980s
1982 - The Compact Disc format is launched (up to 99 tracks, 16 bit, 44.1kHz sampling rate)
1988 - CD-R specification is published, enabling CDs to be created by end users. However, the first CD Writers (such as the Meridian CD Publisher, based on the Yamaha PDS Audio Recorder, cost $35,000 plus a computer to run it). The first recorder under $1000 was launched by Hewlett-Packard in September 1995. In the early days, UK sound designers had to send master tapes to a mastering studio in London, wait a week or so, and pay around £250 to get a digital copy of their tapes.
1990s
BBC Sound Effects are published on CD.
1990s - Akai S1000 and other samplers available for sound designers to store high quality digital samples, and control the playback using a variety of MIDI devices, including control software such as Autograph Sounds' G-Type and MIDI sequencers such as Opcode's Vision.
1992 - MiniDisc (Sony) - replaced reel to reel tape almost overnight in many theatres. Still used in radio studios long after it ceased to be a consumer product.


1992 - DCC - Digital Compact Cassette - not adopted for theatre because although it was very good quality, access to tracks took time as the tape had to be wound forward / backwards, whereas MiniDisc was instant access.
1993 - Digiffects Sound Effects CDs released
1995 - SFX by Stage Research, brought sound playback to the new multimedia PCs running Windows
1997 May - SoundDogs.com is first and largest sound effects and production music library on the internet.
1998 - The internet brings with it instant access to hundreds of thousands of sound effects, at the click of a mouse and payment of a small fee. Computer-based audio playback became more reliable with each new operating system and as storage prices drop, becomes affordable, and a sensible replacement for disc-based (either CD or MiniDisk) playback.
2000s
Digital recorders bring high quality recordings within the reach of every sound designer.
QLab by Figure53 (2006) Designed by theatre sound designer Chris Ashworth in Baltimore, Maryland, USA
Ableton is used by sound designers and composers to create soundscapes.
2010 to present
QLab continues to dominate in the professional and amateur fields.
See also Sound Effects Workflow Through The Years
Last updated: 5 April 2026